This guide is exclusively for importing of new data, and should not be confused with our data updater.
When first getting started with Breww, you will be able to import a large amount of your data via our data importers using a CSV file. This should help get you up and running with Breww a little faster!
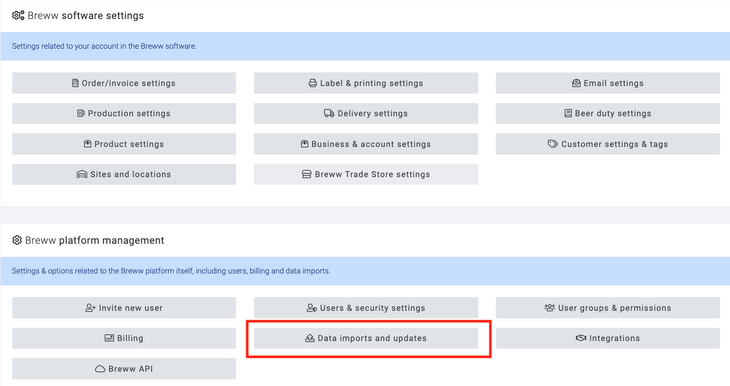
The data importers can be found by heading to Settings->Data imports and updates.
1. Check the required fields
On the main Data imports and updates page, you will have a number of importers to choose from; select the importer that you want to use. Scroll down the page, and under Data fields usable in data upload, you will find a list of all the fields on that data import. Here, it will specify which are required and which are optional. The more data you can put in via the importer, the better!
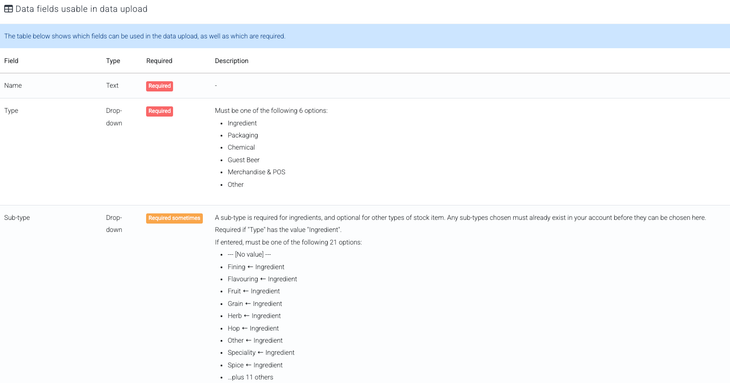
There is also a short description of most fields. It is important that these are also checked prior to starting your imports, as any formatting requirements will be highlighted here. For example, dates must be entered following the format below.

It is worth noting that some fields may need to be set up in Breww before they can be entered into the importer. An example of this is Price books, which will need to be created in Breww before a Customers and contacts import can take place with a price book field. We recommend following the order laid out in the Getting Started Guide when importing your data, which will ensure that any of these additional field requirements are met. Any specific fields will also be highlighted on the appropriate importer guides.
2. Downloading the CSV file template
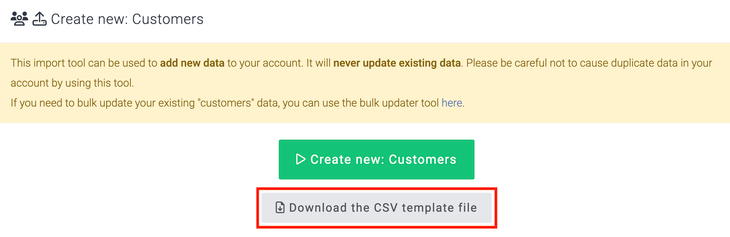
Each importer will allow you to download a CSV file template, which can be filled with data and uploaded. To download the template, select Download the CSV template file. It is essential that the format of the downloaded CSV is followed to help reduce the risk of incorrect data being imported into your account. If your data is currently in your own spreadsheet, we suggest copying and pasting the appropriate data columns into our template to help ensure that your data is imported correctly.
3. Uploading your CSV
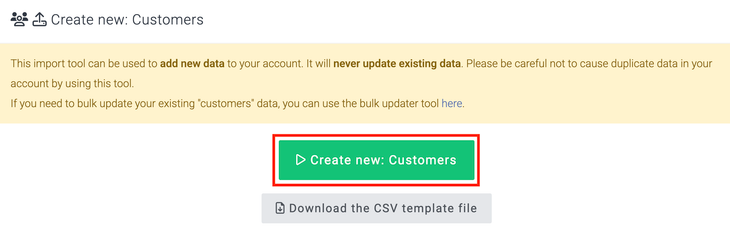
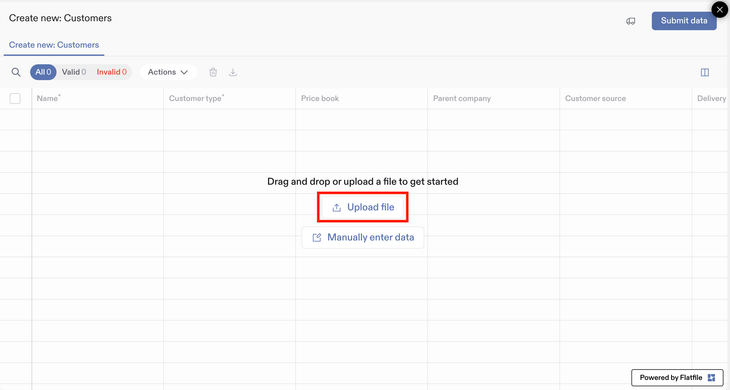
Once you are confident that all your data entries are correct, you can upload your CSV file by pressing the green Create new: button. In this example, it is a customers import.
To choose the file to upload, select the Upload file button.
4. Map your columns to the correct fields in Breww
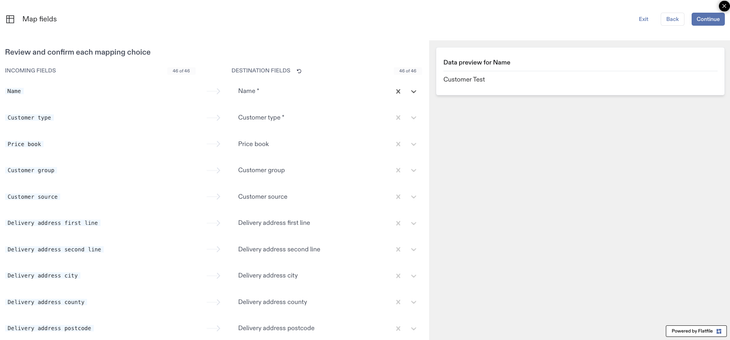
The next stage of your data import is confirming the mapping between your CSV columns and their corresponding fields in Breww. Breww will attempt to map the column headers on the CSV to the right fields in Breww automatically, and if you have used the correct Breww template, then these should be taken care of for you, but it is integral that each of these mappings is checked and confirmed before proceeding to the next stage. In the example below, each of these mappings is correct and you would simply be able to continue with the import.
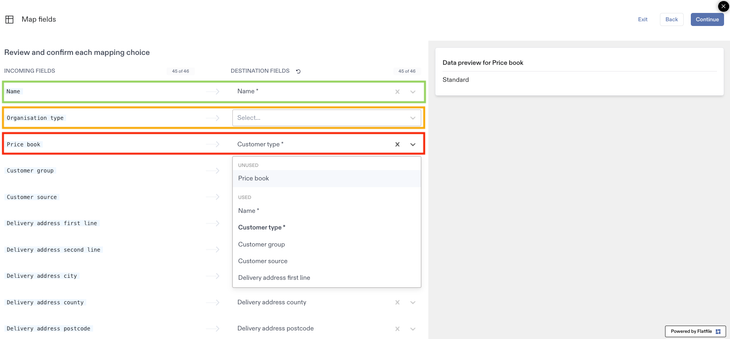
The next example highlights what checks are required when completing a data import. This example shows three scenarios. The first, highlighted in green, shows a successful matching, where the header of Name on the CSV import has matched correctly to the field of Name in Breww.
The second, highlighted in orange, shows the scenario where Breww has been unable to automatically match the header from the CSV with a field in Breww. This should be selected manually by clicking the dropdown where it says Select.
Occasionally, the incorrect fields may get auto-matched, and you will need to check carefully that the pairings are correct. In the third example, highlighted in red, the fields look to have matched successfully and display as having been matched; however, the match is incorrect, and currently, the header of Price book is matched with the field Customer type. This would, therefore, need correcting so that this is matched with Price book in Breww. It is essential that each field is checked prior to confirming the mapping. Once completed, you can select to continue.
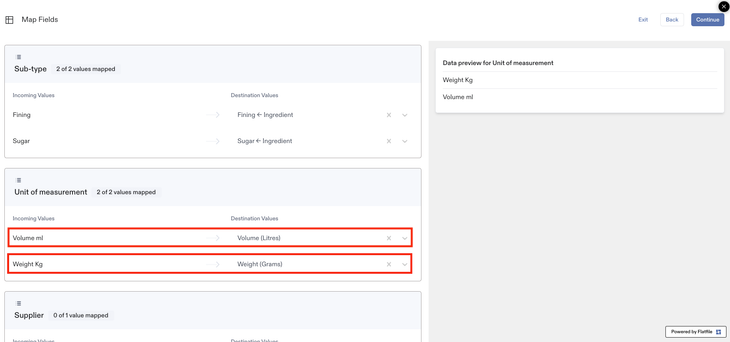
As well as matching headers from your CSV to fields in Breww, there may also be values that need matching to values that are used in Breww. In this example, this CSV has values that do not match the values used in Breww on a Stock items import. In the example below, Breww has attempted to auto-match these values, but as you can see, it has matched them to the incorrect pre-defined values used in Breww. These will need to be corrected using the dropdown under 'Destination values'.
If you are using the Breww CSV provided for that specific uploader, then the automatic matching will be optimised and should always match the right header with the right field in Breww (though you should always still check). If you are not using a Breww-provided CSV and are instead using a CSV with custom headers, you will need to check carefully that these are matched correctly.
5. Repairing incorrect fields
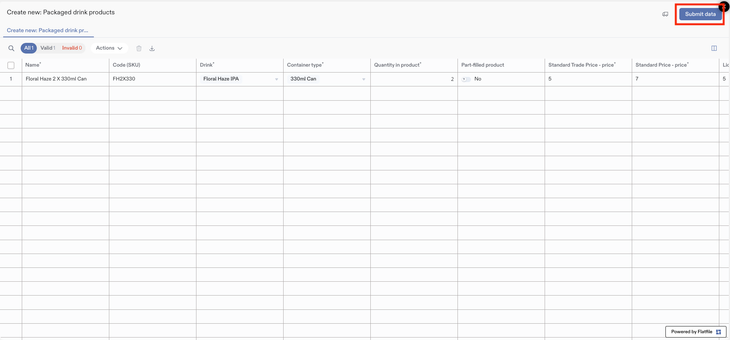
Once you have validated and matched all your fields, you will be able to repair any incorrect data entries. Any data that does not match pre-existing and required data in Breww will be highlighted in red and can be repaired directly on the cell presented in Breww. In the example below, the 'Quantity in product' has been entered as 0.2, instead of 2. There are also price books that need a value entered. Therefore, the Quantity in product must be corrected to use a 'whole' number of beer components and the price book value should be entered.

6. Submitting your import
Once all these fields are corrected, then you can select Submit data. Upon selecting this, the data import will proceed.
Your import will then begin, and you will be informed of its progress.
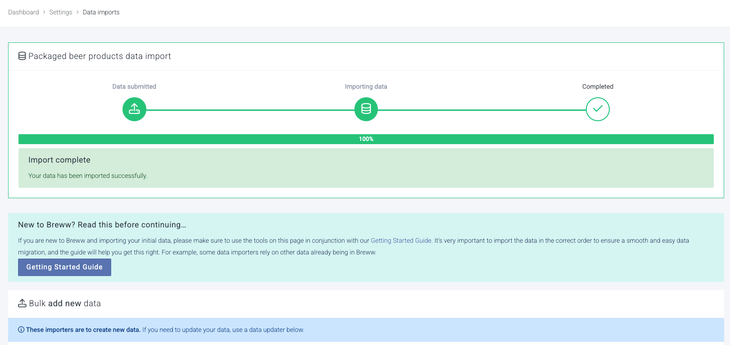
7. Checking your import status
Following the previous step, you will be taken back to the importer page, where your import status should be displayed. Imports usually take a matter of seconds, but this could take a little longer for larger files. If your data import is successful, you will get a Completed message. If your import was unsuccessful, you will get a Failed message alongside a description for the failure.
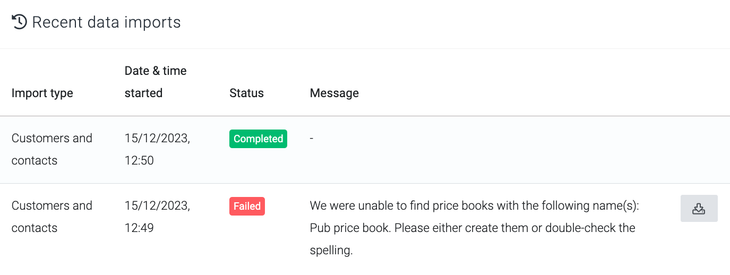
If you receive a status of Failed, then you will need to correct the fields displayed in the message.
8. Checking your data
You can now check whether your data has been imported into Breww correctly. We suggest checking a few samples in your Breww account to ensure that these have been imported as expected. For example, if you have imported customers and contacts, we suggest selecting the Customers tab and checking the data set against the customer accounts.