In order for any accountancy integration in Breww to upload invoices to your accountancy provider, you will, as a minimum, need to set a "default sales account", but Breww also allows you to set up accountancy accounts on your Products, Drink types, Customers, Customer groups and Customer types, giving you complete control of where your sales are sent in your accountancy software.
📕 Before you can begin setting nominal codes against specific Products, Drink types, Customers, Customer groups or Customer types, you will first need to make sure that your accounts are in Breww, the "Chart of accounts" section in our guide on Accountancy integrations explains how to download your chart of accounts. Once you have your chart of accounts, you can begin setting them.
Setting the priority of accounts
It is important to define the priority of accounts in Breww before you start setting them. If, for example, you had an account set on a product and a customer, and you sold that product to that customer, where should Breww place that sale? This is defined in your accountancy configuration if you navigate to Integrations->Accountancy->(Your accountancy platform)->Actions->Configuration, you will arrive on the accountancy integrations dashboard page. Here, there is a Settings tab, and a section titled "Extra options". Within the extra options section, you will find the setting "Prioritise customer chart of accounts over product's", this is unchecked by default, and therefore by default, if there is an account set on a product, this will always be where the sales are sent, over the "Default sales account" and any accounts set on the Customer, Parent company or Customer type for a sale, but if you check the box to prioritise the customer chart of accounts then the hierarchy will be as follows:
When a product does not have its own account set, Breww will check the product's Drink type before falling back to the default account. This applies automatically based on the drink type of the drinks linked to the product. See our guide on Managing your drink types for more information on setting accounts at the drink type level.
The drink type fallback also applies to tracking categories. If a product does not have a tracking category set, Breww will check the product's drink type before using the default.
Setting the accountancy account on a Product
To set a specific nominal code on a product, navigate to your products page in Breww and select Edit. You will then need to scroll down to the section titled Accountancy integration options. Here, you will see a field for accountancy accounts. Click in the box, and a dropdown menu will open, allowing you to choose the nominal account for this product.

It is also possible to set accountancy accounts against your products in bulk using the products bulk updater found in Settings->Data imports & updates under the header "Bulk update data". This updater will have a field allowing you to set an accountancy account on any and all products, or leave them blank if you do not with to set a product level specific account.
Setting the accountancy account on a Drink type
If you have more than one drink type (e.g. Beer and Spirits), you can set accountancy accounts at the drink type level. This is useful when you want all products of a particular drink type to use the same account without having to set it on each product individually.
To set accounts on a drink type, navigate to your accountancy integration's Accounts & tracking page by going to Integrations -> Accountancy -> (Your accountancy platform) -> Actions -> Configuration, then click the Accounts & tracking tab. You will see a Drink types tab where you can set a sales account and tracking category for each drink type.
Any product that does not have its own account set will automatically use its drink type's account. If the drink type also does not have an account set, Breww will use the default sales account. For more details, see our guide on Managing your drink types.
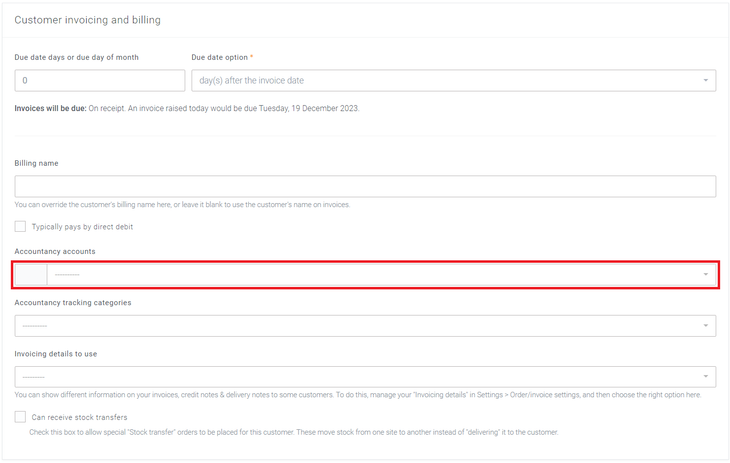
Setting the accountancy account on a Customer
To set a nominal code against a customer, you will need to open that customer's page in Breww, select Edit, scroll down to Customer invoicing and billing and you will find the field for Accountancy accounts.
Setting the accountancy account on a Parent company
Parent companies allow you create a single entity that contains multiple customers, which is great for chains where billing is handled centrally; you can find out more about parent companies in our guide on Parent companies. In order to set a specific account on a parent company you will need to navigate to Customers->View->Parent companies, finding the relevant parent company and using the edit (pencil) icon. Once the edit screen is open, you will need to scroll down to invoicing, and you will see the accountancy accounts field.
If an accountancy account has already been set on a customer, this will always be prioritised over anything set on the parent company.
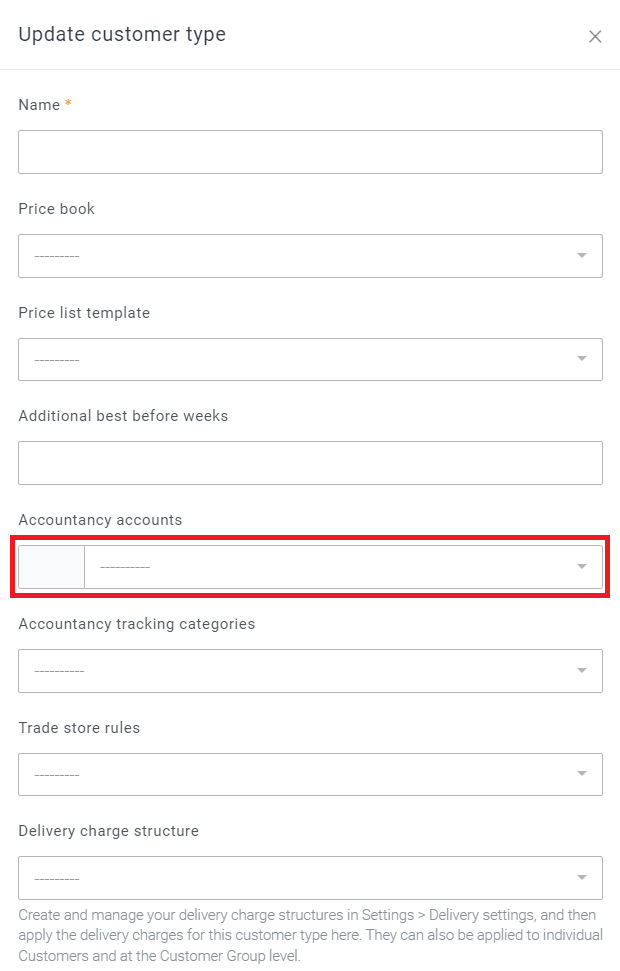
Setting the accountancy account on a Customer type
All customers in Breww have a customer type; typically, these are things like "Pub", "Hotel", or "Export". You can set a specific accountancy account on a customer type by navigating to Customers > Settings & tools > Customer types, finding the relevant customer type, and using the edit (pencil) icon. This will open the update customer type screen where you can set a specific accountancy account for that customer type.
If you set an accountancy account on a customer type and have an accountancy account set on any parent companies, then any customers of this customer type who are part of that company will have their sales sent to the account on the parent company as this is prioritised over the customer type. Equally, any customers within that customer type that have a specific accountancy account set on them will have their sales sent to the accountancy account set on the customer over the parent company or type.