
Inviting your team
Breww does not charge per user, allows you to add multiple new users to your Breww account with no extra charge, and gives flexibility on what areas of Breww you allow invited users to access.
What is a user account in Breww?
In Breww, a user account refers to a personal account created by an individual using their email address. This account is associated with the users' email rather than a specific brewery.
When someone is invited to join a brewery on Breww, they use their user account to access that brewery. However, the user account itself is distinct from any specific brewery and can be used across multiple breweries within the Breww platform if they are invited to join others.
If you remove their access to your brewery, they can still log in to Breww, but they won't be able to access your brewery or its data. However, if they're part of another brewery, they will still have access to that one even after losing access to yours.
Inviting a new user to join your brewery
New users can be added by heading to Settings -> Invite new users. You'll need the Brewery admin permission to see this option.
Enter the email address of the person you'd like to invite. You can invite several people at once by separating their addresses with spaces, new lines, commas or semicolons. Everyone listed receives the same invitation and joins the same groups.
Then choose the User groups to add to. At least one group must be picked, and you can select as many as you need:
- Brewery admin
- Containers
- Deliveries
- Excise duty
- Production
- Reporting
- Sales
- Settings
Any of your own custom groups that grant at least one permission are listed here too, marked with a Custom group badge. A custom group with no permissions on it isn't offered, as it wouldn't give the new user access to anything.
The groups chosen here decide the permissions the user starts with. Once they've accepted, an admin can add further groups or grant additional permissions to them individually. See User groups and permissions for how the two combine.
Once the details are filled in, you can hit Send invite.
The new user will receive an invitation email from Breww, where they will have two links:

- A link to create a Breww account using their email address. This is entirely separate from the brewery that has invited the new user, as the new user will need a unique Breww account before they can accept an invite to a brewery. Once their account is created they will see the invite.
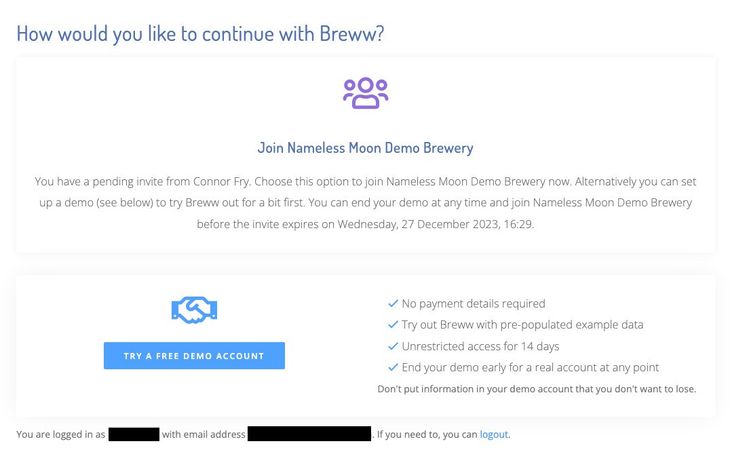
- If a user has already created a unique account with Breww using their email address, they can select the second link, which is the invitation to join the brewery with the access you granted them.

When the user accepts the invite, they will be asked to enter a verification code, which is included in the email sent to them.

If a user receives an error message saying that they already have an account, this will mean that the email they used has already been registered with Breww. So as long as they have access to this email, they should be able to use the forgotten password feature when attempting to log in to gain access to their Breww account, and they will then be able to accept the invite linked.
If the person already uses Breww
Breww checks whether the email address already has a Breww account, and behaves slightly differently depending on what it finds:
- They're already a member of your brewery - no invite is sent, and you'll be told they already have access
- They already use Breww with another live brewery - access to your brewery is granted straight away, with no invite for them to accept. They'll receive an email letting them know, and can switch between breweries at any time from their profile in the top-right of any page
- They only have a demo/test account - the invite is sent as normal, and next time they use Breww they'll see a prompt offering to move across and join you
Tracking, sharing and revoking invites
Every invite you send is listed in the Invitations sent table on the same page, showing who it was sent to, who sent it, which groups it grants, and its current status:
| Status | Meaning |
|---|---|
| Sent | Waiting to be accepted |
| Accepted | The user has joined your brewery |
| Expired | The invite passed its expiry date without being accepted |
| Revoked | An admin cancelled the invite |
Invitations expire after 14 days. If someone tries to accept after that, it won't work and you'll need to send them a fresh invite.
While an invite is still pending, the table shows an Invite link you can copy and send to the person yourself, which is handy if the email hasn't reached them. You can also cancel a pending invite with the red bin icon, and there's nothing to stop you inviting the same person again afterwards.
An invite can only be revoked by the admin who originally sent it. If they aren't available, simply wait for the invite to expire, as an unaccepted invite grants no access.
Once the invite is accepted
The new user's profile will appear in Settings -> Users & security settings. Selecting their profile gives you an overview of what areas of Breww they currently have access to, and options to add other user groups and permissions. Manage user's groups will allow you to give the user access to the related content for that group within Breww, whereas Manage user's additional permissions will allow you to assign a more specific set of permissions to the user. By selecting Brewery admin, they will automatically get full use of all these areas.
For a full explanation of how groups and additional permissions combine, and what each permission allows, see User groups and permissions.
When a team member leaves or changes roles
Before removing a user's access to your brewery, it's important to transfer their outstanding work to another team member. This ensures no tasks are left unattended and customer relationships continue smoothly.
Use the Transfer user data wizard to quickly reassign:
- Outstanding tasks: All pending and in-progress tasks assigned to the departing user
- Customer salesperson assignments: All customers where the user is listed as the salesperson
To transfer data:
- Go to Settings -> Users & security settings
- Click Actions & tools -> Transfer user data
- Follow the three-step wizard to select what to transfer and who should receive it
See Transferring user data between team members for detailed instructions.
Just getting started with Breww? The next guide is Creating sites & locations or you can return to the Getting Started Guide.